Android is the most loved smartphones all over the world due to their easy functionality and support for millions of different applications. With so much usability comes a wide range of bugs and common errors too. Here we are going to talk about one such bug that is most common when you try to connect to a Wifi network from your Android Device. When trying to connect to a Wifi Network, after selecting the Wifi the phone tries to load the wifi by showing “Obtaining Ip Address”.
It shows the same message for some time and then it displays “Failed to Obtain IP Address“. This can cause due to various reasons. We will be discussing what causes this error in this article and after that How to solve it with the help of various different methods.
Check This: ADB Sideload: Download and Learn How to Use
Note that if the first method doesn’t work for you move onto the next step. We can assure you that if you are facing this problem then this is your last stop. So let us start with the article:-
What causes Failed to Obtain IP Address Error in Android?
Whenever you turn on your WI-FI and try to connect to a Wi-Fi network. After inserting the password and clicking Connect you’ll see a message “Obtaining Ip address”. It goes on in a loop for a while and then after sometime it displays a message “Failed to obtain IP address“. The end result is you won’t be able to connect to the internet.
The reason for such behavior is that your phone scans and finds a network and tries to obtain the IP address from it but it disconnects and starts to scan the network again. The error is due to Wi-Fi router that is not able to assign an IP address to your device. This error can be due to various reasons or defects of your Phone. Some them are like faulty wireless security settings, black-list settings in the MAC address, a software conflict etc.
Check This: What Is CQAtest App?
How to Fix Failed to Obtain IP Address Android Error
So all these are what causes the error on your Device. Now let us see how you can solve this error:-
We will be mentioning more than 5 ways to fix the IP Adress issue.
All these methods can solve IP Address issue on Samsung, HTC, PIXEL, OnePlus, Lenovo, MOTO and other brand smartphones.
Fix Failed to Obtain IP Address by Rebooting your Android device and Router
Let us start with the most basic thing first. A lot of errors caused can merely be solved by restarting the Device on which we are operating or by restarting the source of that connection. In this case, we will restart your Android Device and the Router.
You already know how to restart your device. Still to restart your Device, follow the below steps:-
- Hold the Power Button of your Device.
- From the list, Select Restart.
- Your device will automatically Restart.
Now the question is how you can restart your Router. To restart your router follow the below-mentioned Steps:-
- Open the command prompt by typing “cmd” in the search bar.
- Type “ipconfig” inside the newly opened command prompt.
- Go down to Wireless Lan adapter Wi-FI.
- Now copy the Default Gateway IP mentioned there.
- Paste the Default Gateway inside your web browser and hit Enter.
- Now login to your Router by using the username and password. If you have never changed them and don’t know what they are, try using the default user id and password “admin”.
- If you are still not able to log in, contact your ISP.
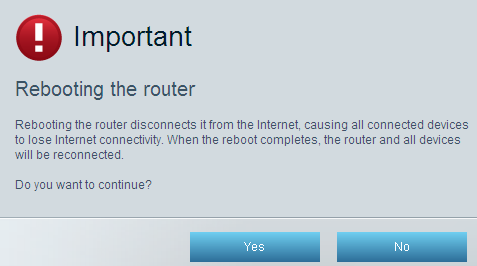
- Once you’re in the web-based application of your router, look around for a Restart or Reboot button.
- Click on it.
- After doing the above two. Try connecting to the Wifi Network again.
This will solve your Problem and you will be easily able to connect to the Network. If your problem is still not solved and you are still getting the error. Try the next method.
Removing and re-adding the network
Sometimes this issue is easily fixed by removing the network from your device before adding it again. By doing this the router will automatically reconfigure some settings and assign you a new IP address. Here’s how:
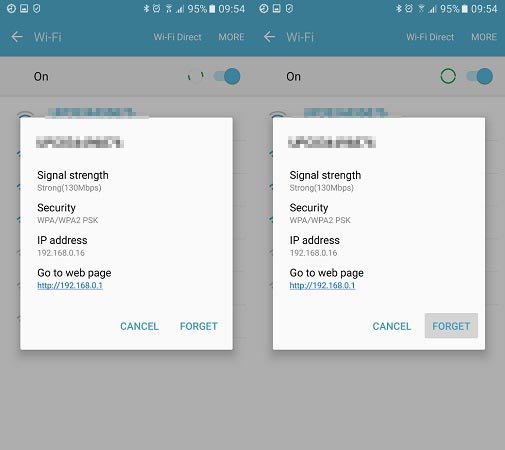
- Go to Settings > Wi-Fi.
- If it refuses to connect, long press on it and tap Forget Password.
- Tap on the network again, enter the password and reconnect.
Setting the WPA2 – PSK
Many of the Device show this error because they don’t work properly with the encryption mode of the router. So you can change it to some other and see if this solves the error. To do so follow these steps:-
- Firstly go to your routers web interface. To do so follow the steps given in Method 1 Restarting the Router.
- Search for Wireless security settings. It will be found near or under Security or WLAN.
- After you find the Wireless Security Setting. See which encryption your router uses. If it’s set on AES, change it to TKIP. If it’s TKIP, change it to AES.
- Click on Save.
- Now again try connecting to the same network after clicking on Forget Password and reentering the Password.
If the error is caused due to it, it will be solved now and you can easily connect to the same Network without any problem.
Also Read: Fix DNS_PROBE_FINISHED_NXDOMAIN Error [5 Ways]
How to Hide Photos, Videos, Files on OnePlus
By Turning OFF the MAC filter
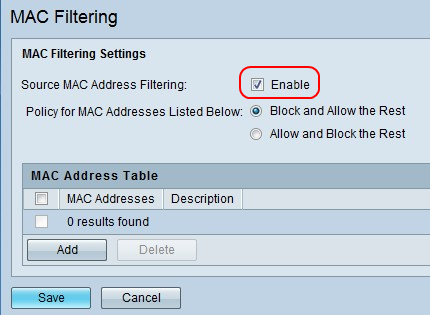
One of the reasons for such error can be due to your router which might be refusing to allow your Android device based on the MAC address. If the MAC filter of your router is ON and your Android device is not on the whitelist, you’ll be stuck with the error “obtaining IP address“. To solve it follow these steps:-
- Firstly. log in to the web interface of your router. Refer method 1 and 3 for it.
- Search for security tab and click on it.
- Make sure the Enable MAC Filter option is deactivated otherwise uncheck the box and hit Save.
- Now switch over to your phone, go to Settings > Wi-Fi and long press on your router’s network.
- Now touch the Forget network option and reconnect it by inserting the password again.
If the issue is fixed you will be able to easily connect to the network and surf internet. If not, maybe this is not the actual cause for the error on your Device.
By using Static IP Address
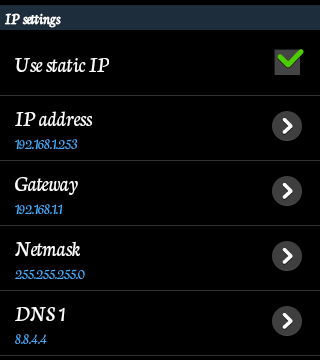
The problem “Failed to Obtain IP Address” can be due to faulty Ip address too. To solve it let us try using a Static IP Address. If your device is having the problem while obtaining the IP address automatically, you can assign one yourself. This fix is not permanent and you have to reconfigure the network settings whenever you switch the Wi-Fi networks, turn off your WI-FI or restart your device.
- Go to Settings on your Android Device.
- Open the Wi-Fi.
- Here look for your desired network.
- Now long press on the WiFi network button and look for an option named Advanced Settings in it.
- Here change the IP setting from DHCP to Static.
- Now assign the IP Address 192.168.1.*** (Add any number from 1 to 225 at ***).
So that’s all for now! By following the above steps you can easily solve Failed to Obtain IP Address error and it will not be displayed again on your Device. Follow the steps in sequence until any steps worked for you. Since the error can be due to many reasons. Therefore there is not a particular fix for it.
If you have doubt in any of the above-mentioned steps you can tell us in the Comments Section below. Thank you for Reading!


